When there is a new project, one of the UX/UI designer’s first step is to understand the business objective as well as the target user group.
Objective
The main goal of this project is to design a responsive web app for property buyers to help finding their “perfect properties” easily and fast.
Background
Real estate investment is an increasingly popular way for individuals to achieve financial security and there are plenty of blogs and agencies providing information. The potential buyers new to the market often struggle to get started without professional guidance and waste time viewing properties out of their range. This web app should provide them with the expertise needed to get started efficiently.
Target group
The primarily target group are new, small-scale property buyers who are looking to invest for additional income or financial security.
Additional information
Unseasoned buyers need access to reliable, uncomplicated information about their potential property investments. Buyers get a feel for a place by viewing comprehensive information about the property and its neighborhood before spending time on-site.
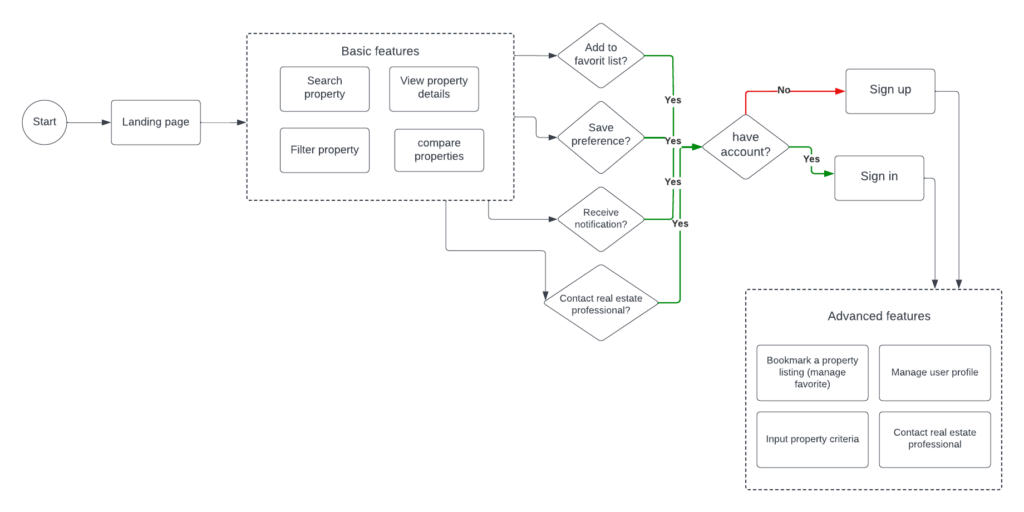
Step 2 - Navigation & User flow
Once we understood the main business objectives and target audience of the project, the next step is to create a user flow to describe and validate, how the user will take a user journey throughout the app.
Please note that the below navigation is a reduced version to describe only a few, key user stories. Usually the real project’s user flow chart is larger and more complex.
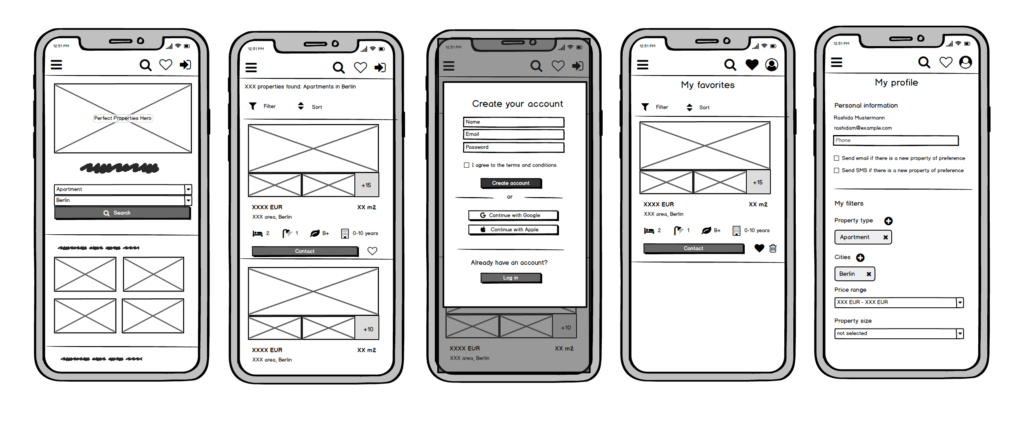
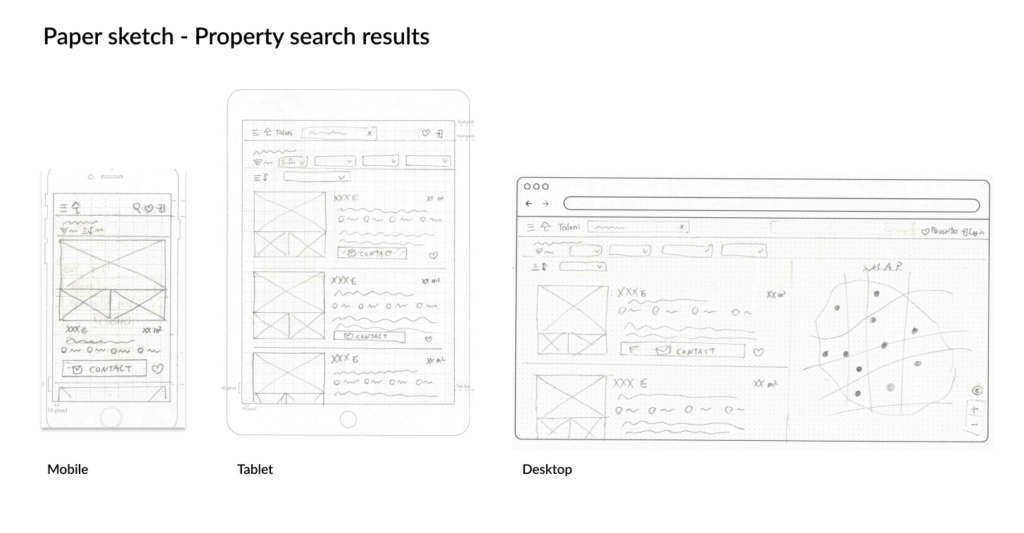
A typical work responsibility for UX/UI designer after the user flow creation is to draft a “low fidelity” mockup. These are typically drafted fast with paper & pen, to visualise and iterate fast. Making a clickable prototype is also a typical work for UX/UI designers (and also one of my favourite part of the job!)
Again the below mockup and prototype is a reduced version. In a real customer project, much more mockup screens will be created.
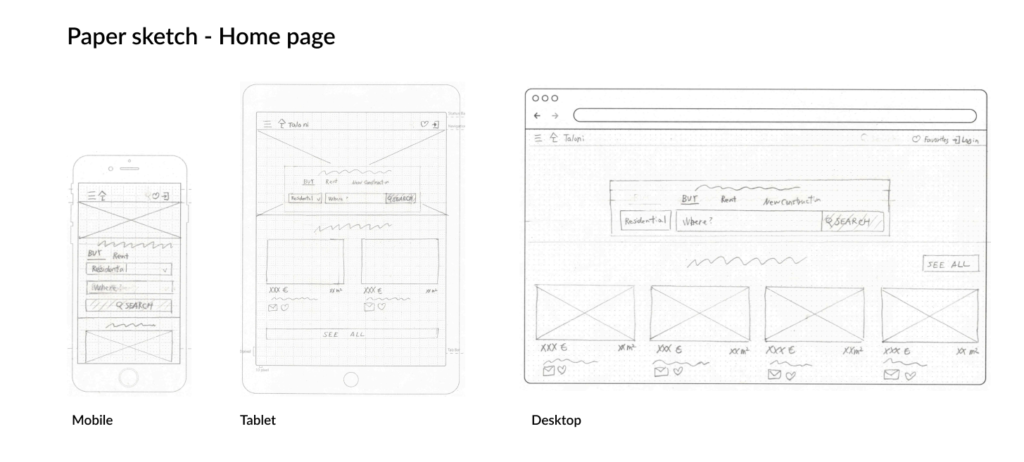
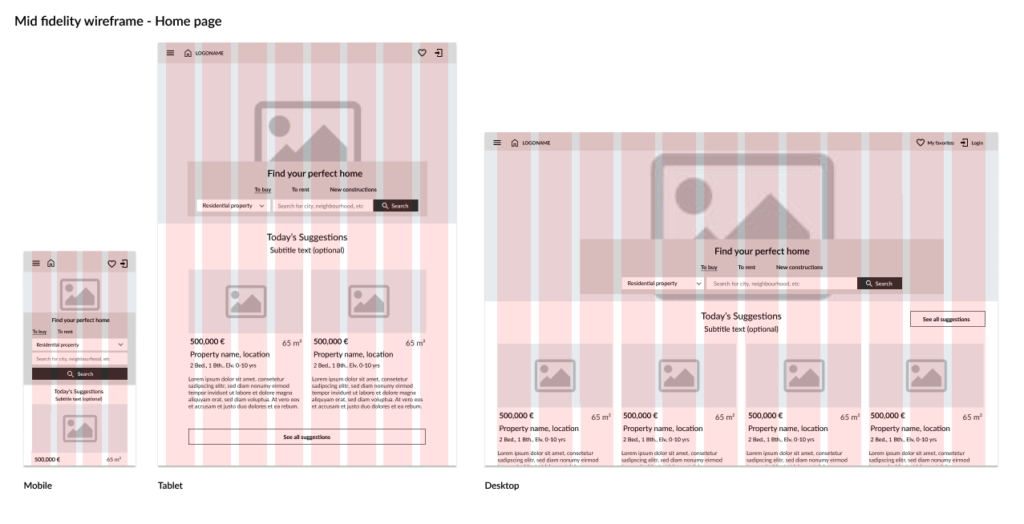
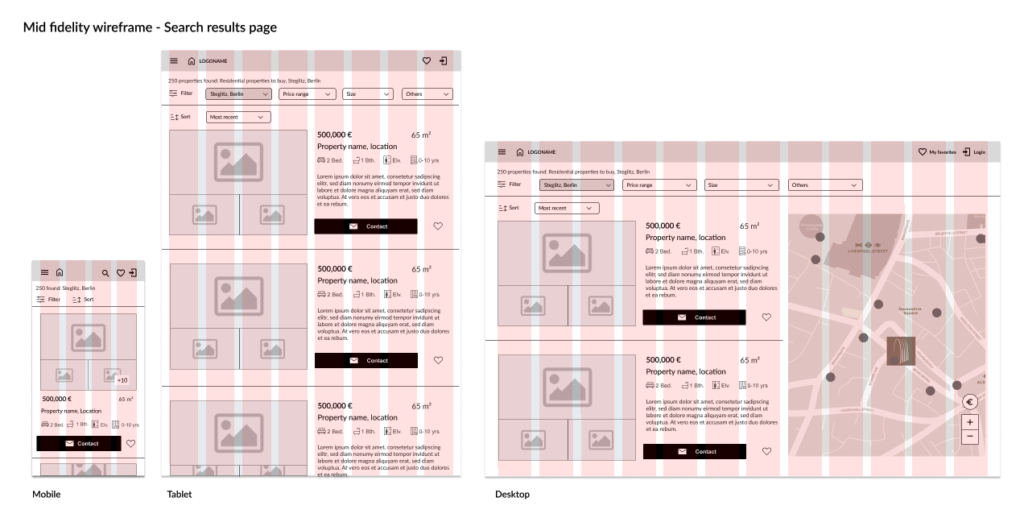
Once the low fidelity mockup is validated, the UX / UI Designer typically moves on to a more refined mockup – so called mid-fidelity mockup.
Since this project requirement is to create a web app (as opposed to mobile native app), this is also a time to design for different device with different breakpoints.
Step 5 - Visual Design Preparation
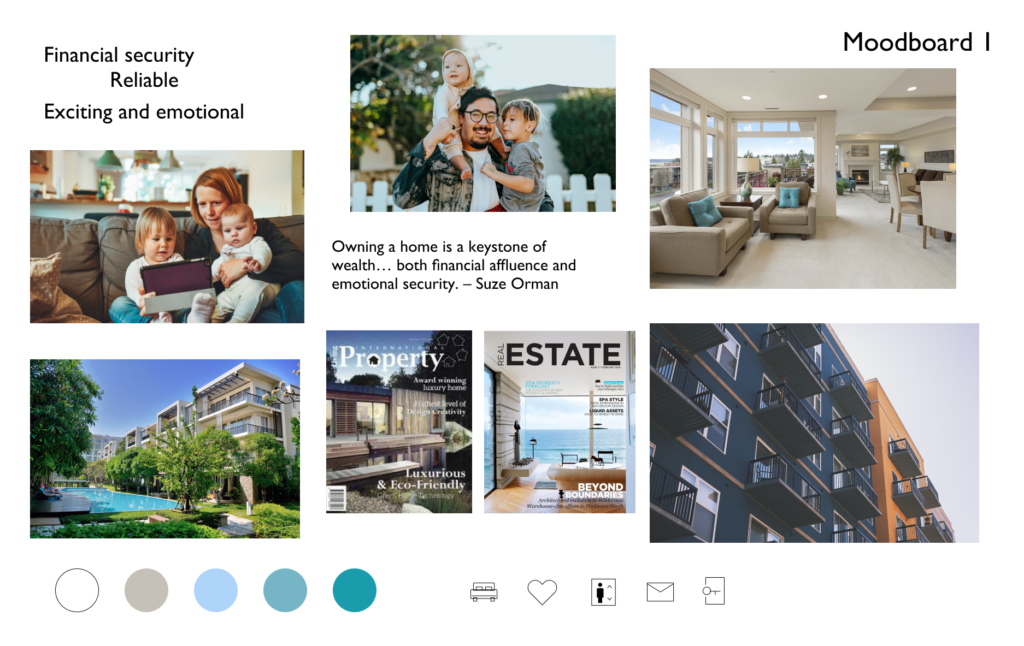
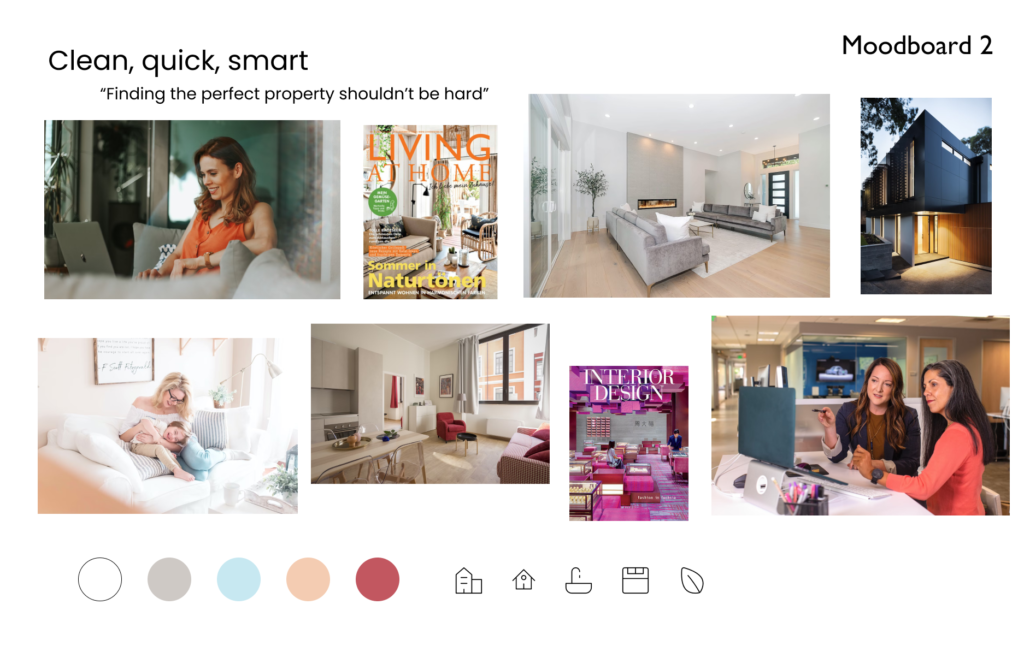
Mood Board
Mood boards is a sort of art board showing a collection of inspirational images and design elements, to share and agree on a visual direction with a stakeholder, customer, or target user group. Creating a mood board is one of a critical steps in the design process.
Usually, several mood board with different visual direction is created, and decide one together with a customer, stakeholder, and/or based on a user testing results.
Step 6 - Visual Design
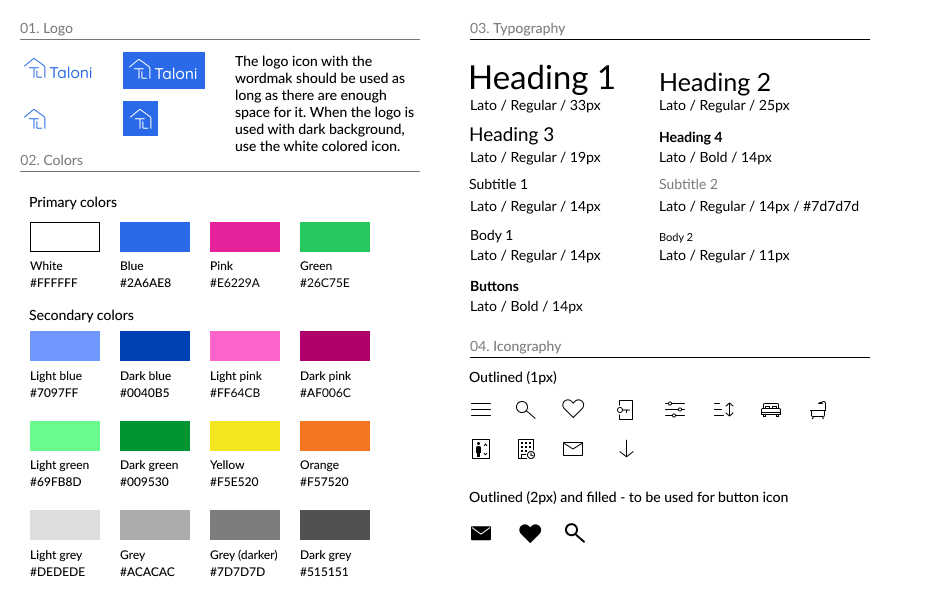
Style guide
Creating a style guide is also a critical role for UX/UI Designers. A Style guide is a visual documentation which includes all of the visual and UI elements of the product, so that people who work on the project have a visual and branding instructions they can follow.
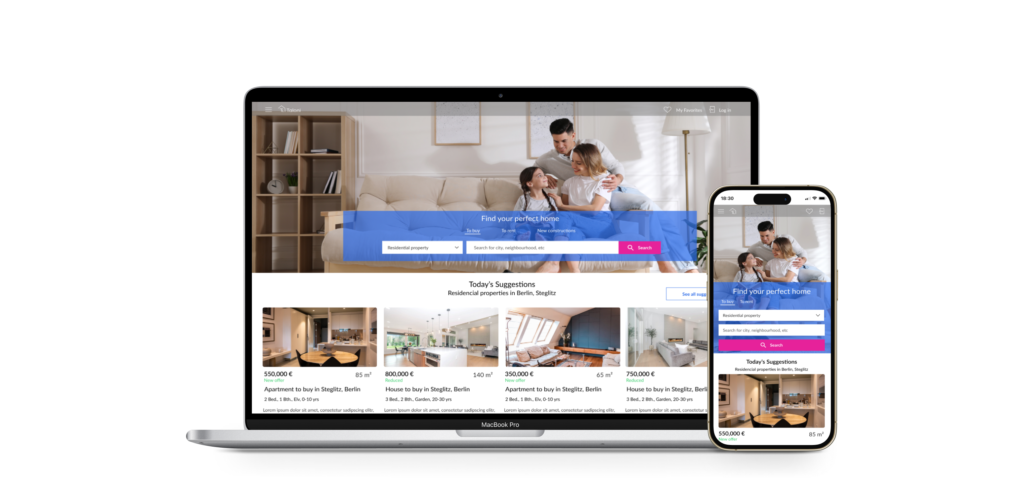
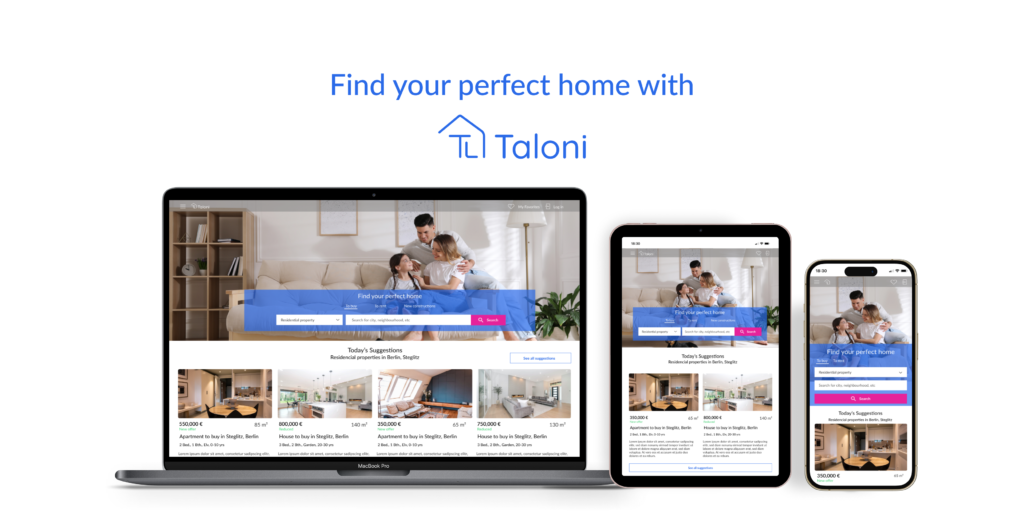
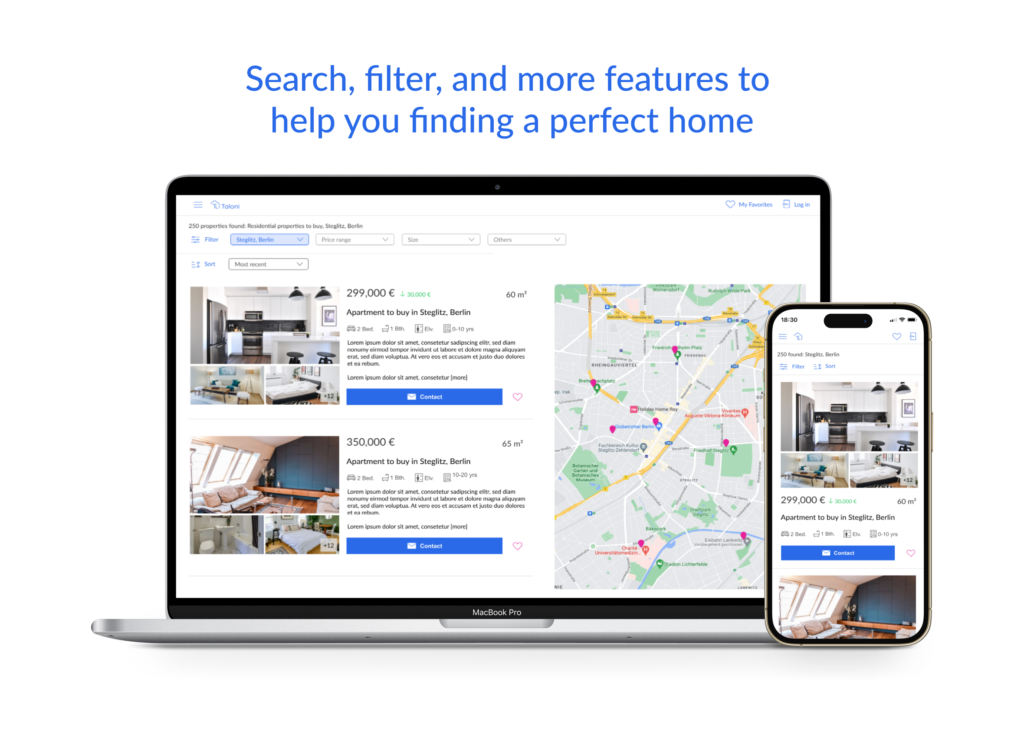
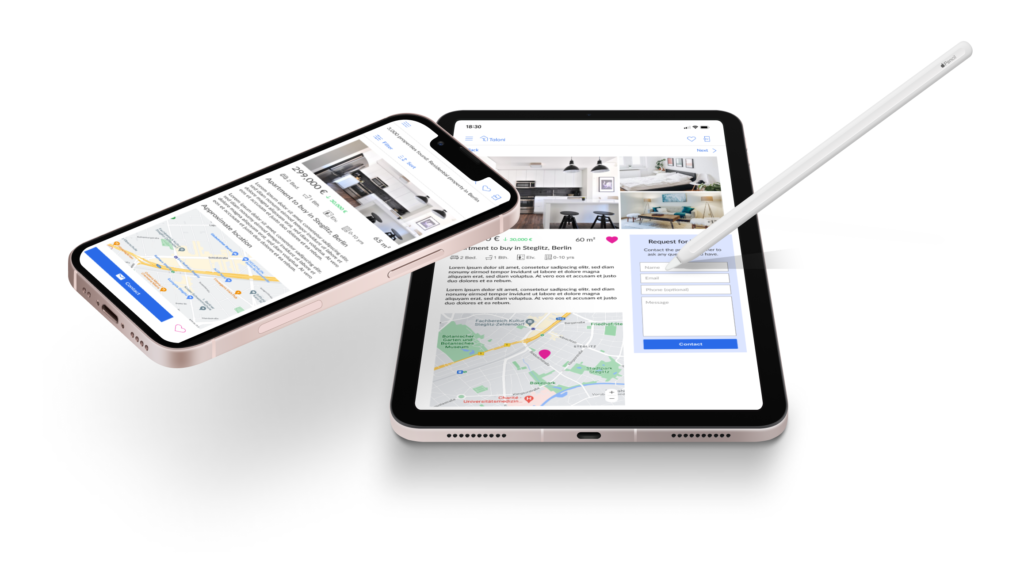
Final mockups
The below screens are some examples of the final design and fit with a real device image, so that it gives a more realistic impression how the app would look like. A deliverable screens for developer hand-off will usually have a different format.